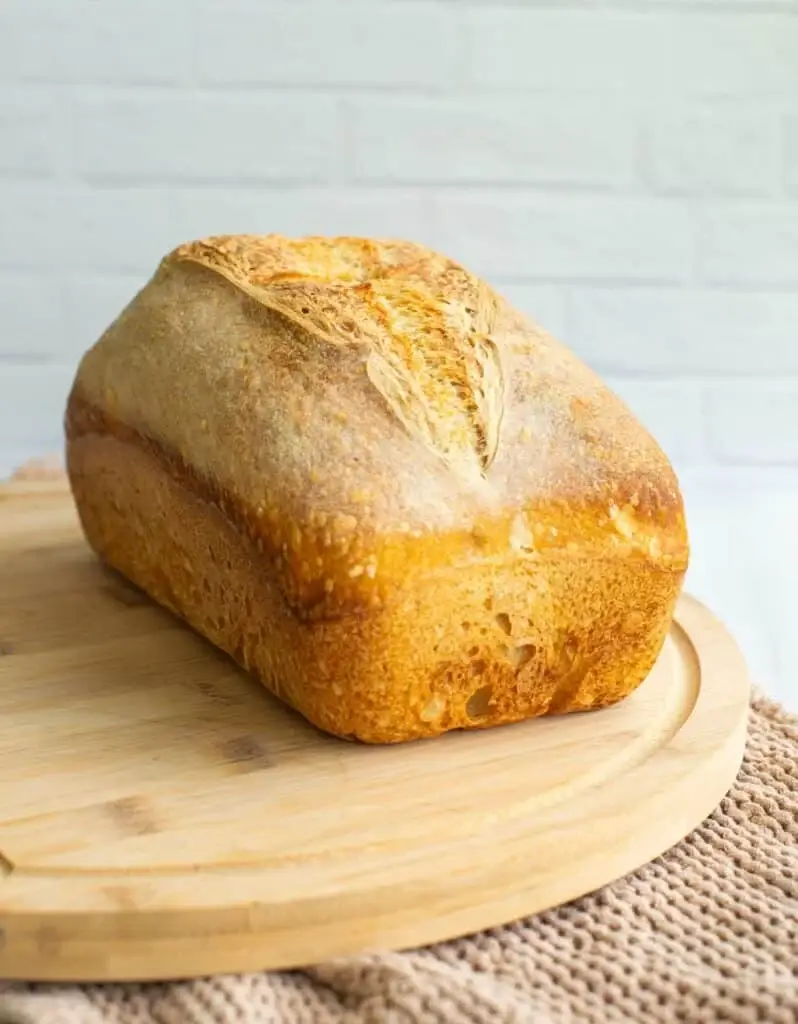
This easy 2 loaf pan sourdough method takes the stress out of traditional bread baking. No banneton baskets, no difficult dough transfers, and no complicated shaping techniques needed. One loaf pan supports the dough while it proofs, and the second loaf pan creates a steam-filled environment during baking, giving you a beautifully risen loaf with a crisp crust and soft, chewy crumb every time. It’s a beginner-friendly approach that delivers bakery-style results with less effort.
Total Time
- Prep time: 20 minutes
- Resting/stretch & folds: 2 hours
- Bulk fermentation: 4–8 hours
- Final proof: 1–2 hours (or overnight in refrigerator)
- Bake time: 45–50 minutes
Total time: Approximately 8–12 hours (plus optional overnight proof)
Here’s a full “2 loaf pan sourdough” recipe based on the no-banneton, low-stress method. One loaf pan supports the dough during proofing, and the second pan acts like a lid during baking, creating steam similar to a Dutch oven.
Ingredients
- 500g bread flour
- 350g water (70% hydration)
- 100g active sourdough starter (fed and bubbly)
- 10g salt
Instructions:
- Mix and rest
Combine water and starter first, then add flour and salt. Mix until no dry flour remains. Cover and rest for 30 minutes. - Stretch and folds
Over the next 1½–2 hours, do 3–4 rounds of stretch-and-folds every 30 minutes. - Bulk ferment
Leave covered at room temperature until dough rises about 50–75% and looks airy. Depending on room temperature, this can take around 4–8 hours. - Prepare loaf pan
Lightly grease or line a loaf pan with parchment. - Shape
Turn dough onto a lightly floured surface and gently shape into a log. No need for tight shaping. Place seam-side down into the loaf pan. - Final proof
Cover and let rise 1–2 hours at room temperature, or refrigerate overnight for more flavor. - Bake with second loaf pan
Preheat oven to 230°C (450°F). Place the second loaf pan upside down over the first pan like a lid.
Bake:
- Covered: 30 minutes
- Remove top pan: 15–20 minutes more until deep golden brown
- Cool
Let cool at least 1 hour before slicing.
Tips:
- If your dough feels too sticky, reduce water to 325–335g.
- Dust the top with rice flour before scoring for cleaner cuts.
- Refrigerating overnight usually improves flavor and makes scoring easier.
This method works because the pan contains the dough shape and the covered-pan setup traps moisture, giving you good oven spring without bannetons or difficult transfers.
FAQs
Can I use all-purpose flour instead of bread flour?
Yes. Bread flour gives a chewier texture and stronger structure, but all-purpose flour works too. The loaf may be slightly softer and less lofty.
Why use two loaf pans?
The second loaf pan acts like a Dutch oven lid by trapping steam around the bread. This helps create better oven spring and a crisp crust.
Do I need a banneton basket?
No. That’s the benefit of this method. The loaf pan supports the dough shape during proofing.
Can I refrigerate the dough overnight?
Yes. An overnight cold proof can improve flavor and make the dough easier to score before baking.
How do I know when bulk fermentation is done?
The dough should look puffy, smoother, and increase in size by about 50–75%. Small bubbles on the surface are a good sign.
Why is my sourdough dense?
Common causes include underproofing, overproofing, inactive starter, or not allowing enough fermentation time.
How should I store homemade sourdough?
Store at room temperature in a bread bag, paper bag, or wrapped in a clean kitchen towel for up to 3 days. For longer storage, slice and freeze.
Can I freeze the loaf?
Yes. Slice it first, place in a freezer-safe bag, and freeze for up to 3 months. Thaw slices as needed.
