
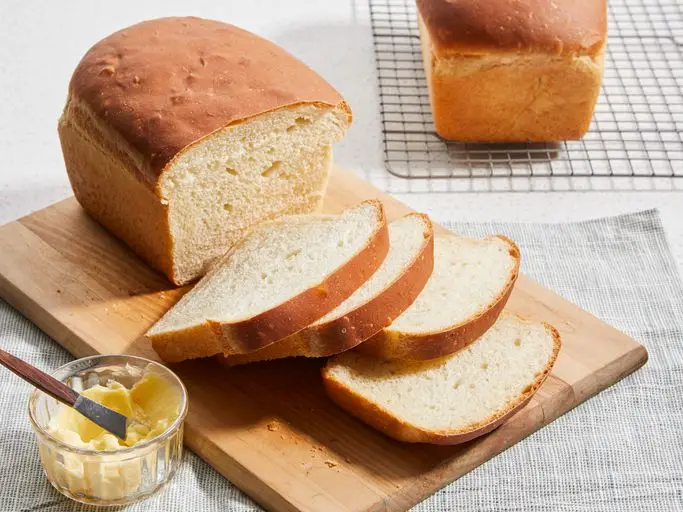
If you’re looking for the cheapest bread recipe, this simple homemade loaf is one of the most affordable options you can make. It uses only a handful of pantry staples—flour, water, yeast, salt, and a small amount of sugar. Compared to buying bread from the store, making your own loaf can save money while giving you fresh, soft, and flavorful bread without preservatives.
Whether you’re feeding a family, living on a tight budget, or simply enjoy baking, this recipe is easy enough for beginners and requires very little equipment. With proper storage, you can enjoy fresh bread for several days or freeze slices for later.
Why This Is One of the Cheapest Bread Recipes
This bread relies on inexpensive ingredients that are widely available. There are no eggs, milk, butter, or specialty flours required. The recipe is flexible enough to use all-purpose flour or bread flour, depending on what you already have.
The cost per loaf is often significantly lower than commercially baked bread, especially when ingredients are purchased in bulk.
Ingredients
- 3½ cups (440 g) all-purpose flour
- 1¼ cups (300 ml) warm water
- 2 teaspoons active dry yeast
- 1 teaspoon sugar
- 1 teaspoon salt
- 1 tablespoon vegetable oil (optional, for a softer loaf)
Equipment
- Large mixing bowl
- Wooden spoon or spatula
- Measuring cups and spoons
- Loaf pan (8½ x 4½-inch or 9 x 5-inch)
- Kitchen towel
- Oven
Step-by-Step Instructions
Step 1: Activate the Yeast
Pour the warm water into a mixing bowl. Add the sugar and yeast, then stir gently. Let the mixture sit for 5–10 minutes until it becomes foamy. This indicates that the yeast is active.
Step 2: Mix the Dough
Add the salt and oil (if using). Gradually stir in the flour until a shaggy dough forms. Continue adding flour until the dough comes together but is still slightly sticky.
Step 3: Knead
Transfer the dough to a lightly floured surface and knead for about 8–10 minutes. The dough should become smooth and elastic. If it’s too sticky, sprinkle in a little more flour, but avoid adding too much.
Step 4: First Rise
Place the dough in a lightly oiled bowl. Cover with a clean towel and let it rise in a warm place for 1 to 1½ hours, or until doubled in size.
Step 5: Shape the Loaf
Punch down the risen dough to release excess air. Shape it into a loaf and place it into a lightly greased loaf pan.
Step 6: Second Rise
Cover the pan and let the dough rise again for 30–45 minutes until it rises slightly above the rim of the pan.
Step 7: Bake
Preheat the oven to 375°F (190°C).
Bake the bread for 30–35 minutes, or until the top is golden brown and the loaf sounds hollow when tapped.
Step 8: Cool
Remove the bread from the pan immediately and cool it on a wire rack before slicing. Cooling helps the crumb finish setting and makes slicing easier.
Tips for Success
- Use warm water, not hot water, to avoid killing the yeast.
- Measure flour accurately by spooning it into the measuring cup and leveling it off.
- Kneading develops gluten, creating a better texture.
- Don’t rush the rising times; proper fermentation improves flavor.
- Cool completely before storing to prevent condensation.
Ways to Save Even More Money
Buying flour in larger bags often lowers the cost per loaf. Store-brand yeast usually works just as well as premium brands. You can also reuse bread bags to store homemade loaves instead of purchasing specialty storage containers.
If you bake frequently, buying yeast in a larger package instead of individual packets is generally much more economical.
Optional Additions
Although this is designed to be the cheapest bread possible, you can customize it when your budget allows.
Some affordable additions include:
- Garlic powder
- Dried herbs
- Sesame seeds
- Oats
- Sunflower seeds
- Whole wheat flour (replace up to half of the all-purpose flour)
Serving Ideas
Fresh homemade bread is incredibly versatile. Try serving it:
- Toasted with butter or margarine
- With peanut butter and jam
- As sandwich bread
- Alongside soups and stews
- With scrambled eggs for breakfast
- As garlic bread
- For grilled cheese sandwiches
- With homemade bean dishes or lentil soup
Storage
Store cooled bread in a sealed bag or airtight container at room temperature for up to 4 days.
For longer storage, freeze the loaf or individual slices for up to 3 months. Thaw at room temperature or toast directly from frozen.
Troubleshooting
Bread Didn’t Rise
Possible causes include expired yeast, water that was too hot, or a room that was too cold.
Dense Texture
This often results from insufficient kneading or not allowing enough time for the dough to rise.
Crust Too Hard
A hard crust can result from overbaking. Brushing the hot loaf lightly with oil or butter immediately after baking helps soften the crust.
Dough Too Sticky
Add flour one tablespoon at a time while kneading. Avoid adding too much, as overly dry dough can produce a heavy loaf.
Nutrition (Approximate Per Slice)
Based on 12 slices per loaf:
- Calories: 130
- Carbohydrates: 26 g
- Protein: 4 g
- Fat: 1.5 g
- Fiber: 1 g
- Sodium: 190 mg
Values will vary depending on the flour and oil used.
Frequently Asked Questions
Can I make this without oil?
Yes. The oil is optional and mainly improves softness. Omitting it makes the recipe even cheaper.
Can I use instant yeast?
Yes. Mix instant yeast directly with the flour and reduce the first mixing step.
Can I make rolls instead of a loaf?
Absolutely. Divide the dough into 10–12 equal portions, let them rise, and bake for 15–20 minutes.
Can I use whole wheat flour?
Yes, but replacing all the flour with whole wheat will produce a denser loaf. Replacing about half gives a softer result.
How do I know when the bread is done?
The loaf should be golden brown and sound hollow when tapped on the bottom. An internal temperature of about 190–200°F (88–93°C) also indicates doneness.
Conclusion
This budget-friendly homemade bread recipe proves that delicious, fresh bread doesn’t have to be expensive. With just a few basic ingredients and a little patience, you can bake a soft, satisfying loaf that’s perfect for sandwiches, toast, or serving with meals. Its simplicity makes it ideal for beginner bakers, while its low cost makes it a practical recipe for anyone looking to save money without sacrificing quality. Once you try baking your own bread, you’ll likely find that it’s not only more economical but also more flavorful and rewarding than many store-bought alternatives.
