
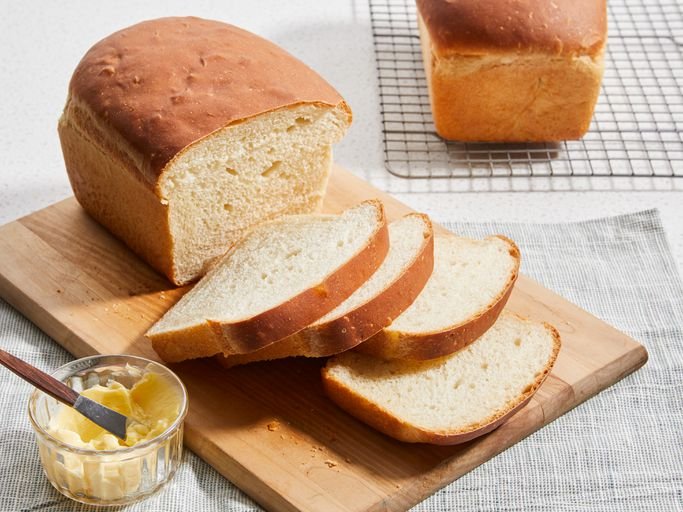
Nothing compares to the taste and aroma of a homemade sourdough sandwich loaf. Unlike rustic artisan sourdough bread, which often has a thick crust and large holes, a sourdough sandwich loaf is designed to be soft, fluffy, and easy to slice. It is perfect for sandwiches, toast, grilled cheese, French toast, and everyday family meals.
This recipe creates a light, tender crumb with a mild sourdough flavor that everyone can enjoy. By combining a well-fed sourdough starter with proper kneading and fermentation, you’ll achieve a loaf that stays fresh for several days while maintaining the wonderful flavor that sourdough is known for.
Whether you’re new to sourdough baking or an experienced baker looking for the perfect sandwich bread, this detailed guide will walk you through every step.
Why You’ll Love This Recipe
This sourdough sandwich loaf is:
- Soft and fluffy
- Easy to slice
- Naturally fermented
- Great for sandwiches and toast
- Free from commercial yeast
- Made with simple pantry ingredients
- Perfect for beginners
Unlike crusty artisan loaves, this bread bakes in a loaf pan, giving it the familiar sandwich shape everyone loves.
Ingredients
For the Dough
- 500 grams (4 cups) bread flour
- 100 grams active sourdough starter (100% hydration)
- 300 grams warm water
- 30 grams unsalted butter, softened
- 20 grams honey or sugar
- 10 grams salt
Optional:
- 20 grams milk powder for a softer crumb
- 15 grams olive oil for extra tenderness
Equipment Needed
- 9×5-inch loaf pan
- Large mixing bowl
- Kitchen scale
- Dough scraper
- Clean towel
- Plastic wrap
- Cooling rack
- Bread knife
Understanding the Ingredients
Bread Flour
Bread flour contains more protein than all-purpose flour, producing stronger gluten development and a higher rise.
Active Sourdough Starter
Your starter should be bubbly, active, and recently fed. It should double in size within 4–6 hours after feeding.
Water
Warm water encourages fermentation and helps activate the starter.
Ideal temperature:
75–80°F (24–27°C)
Butter
Butter softens the crumb and keeps the loaf tender.
Honey
Honey feeds the sourdough while adding subtle sweetness.
Sugar works equally well.
Salt
Salt strengthens gluten and balances flavor.
Never skip it.
Step 1: Feed Your Starter
Feed your sourdough starter 4–6 hours before baking.
It should:
- Double in size
- Look bubbly
- Smell pleasantly tangy
- Float in water (optional float test)
Using an inactive starter will result in a dense loaf.
Step 2: Mix the Dough
In a large bowl combine:
- Active starter
- Warm water
- Honey
Stir until dissolved.
Add:
- Bread flour
- Milk powder (optional)
Mix until no dry flour remains.
Cover and let rest for 30 minutes.
This rest period is called the autolyse.
Step 3: Add Butter and Salt
Add:
- Softened butter
- Salt
Knead until fully incorporated.
Continue kneading for 8–10 minutes.
The dough should become:
- Smooth
- Elastic
- Slightly tacky
Avoid adding too much extra flour.
Step 4: Bulk Fermentation
Place dough in a lightly greased bowl.
Cover.
Ferment for 4–6 hours at room temperature.
Every 30 minutes during the first 2 hours perform stretch-and-folds.
Simply pull one side of the dough upward and fold it toward the center.
Rotate and repeat four times.
This strengthens the gluten naturally.
Step 5: Check Dough Readiness
The dough should:
- Increase by about 50%
- Feel airy
- Show bubbles underneath
- Jiggle slightly when the bowl is shaken
Do not wait for it to double completely.
Step 6: Shape the Dough
Turn dough onto a lightly floured surface.
Flatten gently into a rectangle.
Roll tightly from one short end.
Pinch the seam closed.
Tuck the ends underneath.
This creates surface tension for a beautiful loaf.
Step 7: Place into the Pan
Grease your loaf pan.
Place the dough seam-side down.
Cover loosely with plastic wrap or a damp towel.
Step 8: Final Proof
Allow dough to proof for 2–4 hours.
It should rise to about 1 inch above the rim of the loaf pan.
If your kitchen is cool, proofing may take longer.
Do not rush this step.
Overnight Proof Option
After shaping:
- Cover the loaf.
- Refrigerate overnight (8–16 hours).
- Bake directly from the refrigerator or let it sit at room temperature for 30–60 minutes before baking.
This develops a deeper sourdough flavor.
Step 9: Bake
Preheat oven to:
375°F (190°C)
Bake for:
35–40 minutes
The loaf should become:
- Deep golden brown
- Firm
- Hollow-sounding when tapped
Internal temperature:
200–205°F (93–96°C)
Optional Butter Finish
Immediately after baking:
Brush the hot loaf with melted butter.
This keeps the crust soft and shiny.
Step 10: Cool Completely
Remove bread from the pan immediately.
Cool on a wire rack for at least one hour.
Cutting too early may create a gummy interior.
Storage
Store at room temperature:
3–4 days
Wrap in:
- Bread bag
- Cotton towel
- Airtight container
Avoid refrigeration, which dries bread quickly.
Freezing
Slice the loaf before freezing.
Wrap tightly in plastic wrap and foil.
Freeze for up to 3 months.
Toast slices directly from frozen.
Serving Ideas
This loaf is delicious with:
- Peanut butter
- Jam
- Avocado
- Turkey sandwiches
- Grilled cheese
- Ham and cheese
- Egg salad
- Tuna salad
- French toast
- Garlic toast
Tips for Success
Always use an active starter.
Weigh ingredients for accuracy.
Do not overproof.
Perform stretch-and-folds during bulk fermentation.
Shape the dough tightly.
Allow the loaf to cool before slicing.
Use bread flour for the softest texture.
Common Mistakes
Dense Bread
Cause:
- Weak starter
- Underproofed dough
Solution:
Use a freshly fed starter and allow more fermentation time.
Gummy Interior
Cause:
- Underbaked
- Sliced while hot
Solution:
Bake until fully cooked and cool completely.
Flat Loaf
Cause:
- Overproofed dough
Solution:
Bake when dough reaches just above the rim of the pan.
Thick Crust
Cause:
- Overbaking
Solution:
Bake only until the loaf reaches an internal temperature of 200–205°F.
Brush with butter afterward.
Variations
Whole Wheat Sandwich Loaf
Replace 100–150 grams of bread flour with whole wheat flour.
Increase water slightly if needed.
Honey Oat Loaf
Add:
- 50 grams rolled oats
- Extra tablespoon of honey
Sprinkle oats on top before baking.
Seeded Sandwich Bread
Mix in:
- Sunflower seeds
- Pumpkin seeds
- Sesame seeds
- Flaxseed
Milk Bread Style
Replace half the water with warm milk.
The loaf becomes softer and richer.
Nutrition (Approximate Per Slice)
- Calories: 160
- Protein: 5 g
- Carbohydrates: 30 g
- Fat: 2.5 g
- Fiber: 1 g
- Sugar: 1.5 g
- Sodium: 190 mg
Values vary depending on ingredient brands and slice thickness.
Frequently Asked Questions
Can I use all-purpose flour?
Yes, but bread flour provides better structure and a softer sandwich texture.
Can I make this recipe without butter?
Yes. Substitute the butter with olive oil or another neutral oil for a dairy-free loaf.
Why didn’t my loaf rise?
The most common causes are an inactive sourdough starter, cool room temperatures, or insufficient fermentation time.
Can I add commercial yeast?
You can, but this recipe is designed to rely entirely on natural sourdough fermentation. Adding yeast will shorten fermentation and reduce the distinctive sourdough flavor.
How do I know when the bread is done?
The crust should be evenly golden brown, the loaf should sound hollow when tapped on the bottom, and the internal temperature should reach 200–205°F (93–96°C).
Final Thoughts
A homemade sourdough sandwich loaf combines the wholesome benefits of natural fermentation with the soft texture and sliceable shape that make it ideal for everyday use. With a bubbly starter, careful fermentation, and proper shaping, you can create bakery-quality bread that is perfect for sandwiches, toast, or simply enjoying warm with butter. Once you’ve mastered this recipe, you’ll have a dependable loaf that’s both delicious and versatile, making it a staple in your home baking routine.
