
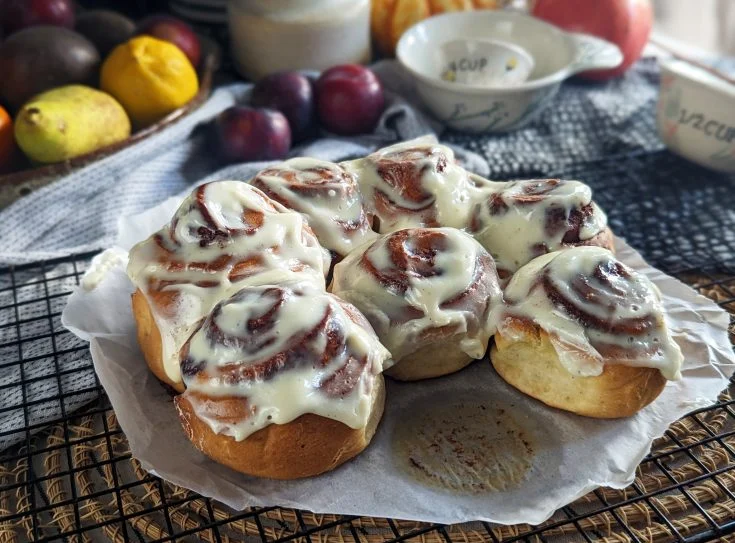
There’s something magical about the smell of freshly baked cinnamon rolls filling your kitchen. Warm cinnamon, rich butter, and sweet vanilla create an aroma that instantly makes a home feel cozy. For people following a gluten-free diet, however, finding cinnamon rolls with the same soft texture as traditional wheat-based versions can be challenging. Many gluten-free recipes turn out dry, crumbly, or dense. This recipe is designed to solve those problems by producing incredibly soft, fluffy, and flavorful gluten-free cinnamon rolls that taste just as satisfying as classic bakery versions.
Whether you’re making these for a weekend breakfast, a holiday brunch, or simply because you’re craving homemade comfort food, this recipe delivers excellent results. The dough is easy to work with, the cinnamon filling is perfectly gooey, and the cream cheese frosting melts beautifully over the warm rolls.
Why You’ll Love This Recipe
- 100% gluten-free
- Soft and fluffy texture
- Rich cinnamon flavor
- Easy to prepare
- Perfect for breakfast or dessert
- Freezer-friendly
- Great for beginners
Ingredients
For the Dough
- 3½ cups gluten-free all-purpose flour blend (contains xanthan gum)
- 2¼ teaspoons instant yeast (1 packet)
- ¼ cup granulated sugar
- 1 teaspoon salt
- 1 teaspoon baking powder
- 2 large eggs, room temperature
- ¾ cup warm milk (about 110°F)
- ¼ cup melted butter
- 1 teaspoon vanilla extract
Cinnamon Filling
- ½ cup softened butter
- 1 cup brown sugar
- 2 tablespoons ground cinnamon
- ½ teaspoon nutmeg (optional)
- Pinch of salt
Cream Cheese Frosting
- 4 ounces cream cheese, softened
- 2 tablespoons butter, softened
- 1½ cups powdered sugar
- 1 teaspoon vanilla extract
- 2–3 tablespoons milk
Equipment Needed
- Mixing bowls
- Measuring cups and spoons
- Electric mixer
- Rolling pin
- 9×13-inch baking dish
- Parchment paper
- Sharp knife or dental floss for cutting
Step 1: Activate the Yeast
Warm the milk until it reaches approximately 110°F (43°C). It should feel warm but not hot. Stir in the sugar and yeast, then allow it to rest for 5–10 minutes until foamy. This indicates the yeast is active.
Step 2: Make the Dough
In a large mixing bowl combine:
- Gluten-free flour
- Salt
- Baking powder
In another bowl whisk together:
- Eggs
- Melted butter
- Vanilla
- Yeast mixture
Gradually mix the wet ingredients into the dry ingredients. Continue mixing for about five minutes. Gluten-free dough is usually much softer and stickier than wheat dough, so don’t worry if it doesn’t resemble traditional bread dough.
Step 3: First Rise
Cover the bowl with plastic wrap or a clean towel and place it somewhere warm for about one hour. The dough should noticeably increase in size.
Step 4: Prepare the Filling
Mix together:
- Soft butter
- Brown sugar
- Cinnamon
- Nutmeg
- Salt
Stir until smooth and spreadable.
Step 5: Roll the Dough
Lay a large sheet of parchment paper on your work surface.
Dust lightly with gluten-free flour.
Place the dough onto the parchment.
Roll into a rectangle about:
- 12 inches wide
- 16 inches long
- ¼ inch thick
If the dough sticks, place another sheet of parchment paper on top while rolling.
Step 6: Add the Filling
Spread the cinnamon mixture evenly over the dough, leaving about half an inch around the edges.
Cover every corner evenly so each bite contains plenty of cinnamon filling.
Step 7: Roll the Log
Starting from the long side, gently roll the dough into a tight log.
Take your time to prevent cracking.
If needed, use the parchment paper to help lift and roll.
Step 8: Slice the Rolls
Using unflavored dental floss or a sharp knife, cut the log into 12 equal pieces.
Arrange them in a greased 9×13-inch baking dish with a little space between each roll.
Step 9: Second Rise
Cover the baking dish.
Allow the rolls to rise for another 30–45 minutes.
They should become noticeably puffier.
Step 10: Bake
Preheat the oven to 350°F (175°C).
Bake for:
25–30 minutes
The tops should become lightly golden while remaining soft.
Avoid overbaking because gluten-free baked goods dry out quickly.
Step 11: Make the Frosting
Beat together:
- Cream cheese
- Butter
Gradually add powdered sugar.
Mix in vanilla.
Add milk one tablespoon at a time until the frosting becomes smooth and spreadable.
Step 12: Frost the Rolls
Allow the cinnamon rolls to cool for about 10 minutes.
Spread the frosting generously over the warm rolls.
The frosting will melt into every swirl, creating the perfect finish.
Tips for Success
Use Room Temperature Ingredients
Eggs, butter, and cream cheese blend more smoothly and help create a lighter dough.
Don’t Add Too Much Flour
The dough should remain slightly sticky. Adding extra flour often leads to dry cinnamon rolls.
Roll Gently
Gluten-free dough is more delicate than traditional dough. Slow, gentle rolling prevents tearing.
Don’t Overbake
Even five extra minutes can noticeably dry out gluten-free baked goods.
Let the Dough Rise in a Warm Place
A warm kitchen encourages better yeast activity and results in fluffier rolls.
Flavor Variations
Apple Cinnamon
Add one cup of finely diced apples to the filling.
Maple Pecan
Mix one cup chopped pecans into the filling and replace vanilla frosting with maple glaze.
Orange Cinnamon
Add one tablespoon orange zest to both the dough and frosting.
Chocolate Cinnamon
Sprinkle mini chocolate chips over the cinnamon filling before rolling.
Pumpkin Spice
Mix two teaspoons pumpkin pie spice into the filling and add two tablespoons pumpkin puree to the dough.
Storage Instructions
Store leftover cinnamon rolls in an airtight container at room temperature for up to two days.
For longer storage, refrigerate them for up to five days.
Warm individual rolls in the microwave for 20–30 seconds before serving to restore their soft texture.
Freezing Instructions
These cinnamon rolls freeze exceptionally well.
Freeze before baking:
- Assemble the rolls.
- Place them in the baking pan.
- Freeze until solid.
- Wrap tightly with plastic wrap and aluminum foil.
When ready to bake, thaw overnight in the refrigerator, allow them to rise at room temperature for about one hour, then bake as directed.
You can also freeze fully baked rolls without frosting. Reheat in the oven at 300°F until warmed through, then frost before serving.
Frequently Asked Questions
Can I make these dairy-free?
Yes. Replace the butter with a dairy-free alternative, use your favorite plant-based milk, and substitute dairy-free cream cheese in the frosting.
Can I prepare them the night before?
Absolutely. After cutting and arranging the rolls in the baking dish, cover and refrigerate overnight. The next morning, let them sit at room temperature for 45–60 minutes before baking.
Which gluten-free flour works best?
A high-quality gluten-free all-purpose flour blend that already contains xanthan gum generally produces the best texture. If your blend does not include xanthan gum, add about 1 teaspoon to the dough.
Why are my cinnamon rolls dry?
The most common reasons are adding too much flour or baking them too long. Measuring flour carefully and checking the rolls a few minutes before the recommended baking time can help keep them soft.
Can I add raisins or nuts?
Yes. Raisins, chopped walnuts, or pecans can be mixed into the filling for added flavor and texture.
Serving Suggestions
These gluten-free cinnamon rolls are delicious on their own, but they also pair well with fresh fruit, scrambled eggs, yogurt, or a hot cup of coffee or tea. For special occasions, serve them warm with extra cream cheese frosting on the side or a drizzle of maple syrup for an extra indulgent treat.
Final Thoughts
Making gluten-free cinnamon rolls from scratch may seem intimidating at first, but with the right ingredients and a little patience, the results are incredibly rewarding. This recipe creates tender, fluffy rolls with a rich cinnamon-sugar filling and a smooth cream cheese frosting that rivals any bakery version. Whether you’re baking for yourself, your family, or guests with gluten sensitivities, these cinnamon rolls are sure to become a favorite. Enjoy them fresh from the oven for the best flavor and texture, and don’t be surprised if they’re gone within minutes.
